第一次开通博客园的博客,有点小激动。废话就不多说了,马上开始。
1、安装Visual Stuido2015(注意,在安装的时候请不要勾选Android开发的相关组件,因为这样的安装速度极慢,10几个小时都搞不定,因为我们要独立安装这些相关的组件)或者直接典型安装。
2、安装JDK7,双击这个图标,然后狂按下一步就可以了 。
。
3、安装gtk-sharp,一样双击打开狂按下一步。
4、安装Android SDK(最好安装在其他分区,这个东西后期会很大,因为要下载相关的SDK API,还要科学上网才能下载API,至于科学上网,你们懂的)

只要下载相关的API就好了,至于是否下载系统镜像,你们随意,不过速度会很慢。我们不需要使用自带的模拟器,使用微软VS的安卓模拟器就可以了。
就是这个:

回到SDK界面,把这些装上(需要科学上网)

下面的那些也要勾上,除了有System Image这样的不勾,其余的最后勾上,也可以按需勾。
5、解压Andorid NDK,至于放在哪里,您随意。
6、安装Xamarin和Xamarin的VS插件。(收费的东西,大家都懂,但是不怕,购买这个的钱我们在清朝的时候就付清了)
(先安装Xamarin Studio再安装Xamarin For VS插件)
7、安装VS安卓模拟器
上面的步骤基本已经完成了,下面我们就要打开VS,选择“新建项目”,定位到Android程序模板那里,新建一个“空白的Android程序模板,点击确定

双击Main.axml打开设计视图
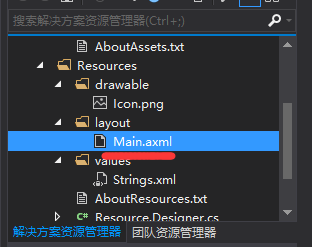
这个是我写的,可以随便在工具箱里拖点什么出来,也可以转到源代码视图自己添加代码

<?xml version="1.0" encoding="utf-8"?>
<LinearLayout xmlns:p1="http://schemas.android.com/apk/res/android"
    p1:orientation="vertical"
    p1:layout_width="match_parent"
    p1:layout_height="match_parent"
    p1:id="@+id/linearLayout1">
    <TextView
        p1:layout_width="match_parent"
        p1:layout_height="64.6dp"
        p1:id="@+id/textView1"
        p1:textSize="22sp"
        p1:textColor="@android:color/holo_red_light" />
    <Button
        p1:text="确定"
        p1:layout_width="match_parent"
        p1:layout_height="71.5dp"
        p1:id="@+id/button1"
        p1:background="@android:color/holo_red_light"
        p1:textSize="18sp" />
    <TextView
        p1:text="The First Android Application Designed By LWJ"
        p1:layout_width="match_parent"
        p1:layout_height="85.0dp"
        p1:id="@+id/textView2"
        p1:textColor="@android:color/holo_blue_light"
        p1:textSize="22sp"
        p1:layout_marginTop="@android:dimen/app_icon_size" />
</LinearLayout>
这是上面视图的代码。
转到MainActivity.cs,编写代码(我所编写的只是一个HelloWorld)
using Android.App;
using Android.Widget;
using Android.OS;

namespace HelloAndroid
{
    [Activity(Label = "HelloAndroid", MainLauncher = true, Icon = "@drawable/icon")]
    public class MainActivity : Activity
    {
        int count = 1;

        protected override void OnCreate(Bundle bundle)
        {
            base.OnCreate(bundle);

            // Set our view from the "main" layout resource
            SetContentView(Resource.Layout.Main);

            // Get our button from the layout resource,
            // and attach an event to it
            Button button = FindViewById<Button>(Resource.Id.button1);
            TextView ts = FindViewById<TextView>(Resource.Id.textView1);
            button.Click += delegate
            {
                ts.Text = "Hello Android";
                button.Text = string.Format("第{0}次点击", count++);
            };
        }
    }
}
最后选择模拟器,运行看看效果

 运行起来了,siguoyi,大功告成!


